
As part of our STFC funding we made 20 kits of galaxy models. Early on we realized that 3D printing all the galaxies would take over 20 weeks of non-stop printing, so we started looking into ways of mass producing our galaxies.
To help with this process we partnered with Ted Turnbull who is part of the University of Portsmouth’s Faculty of Creative and Cultural Industries (CCI) and works with the Eldon Production Centre (EPC). After some testing we settled upon making silicone moulds and use those to cast our final models in clear resin.
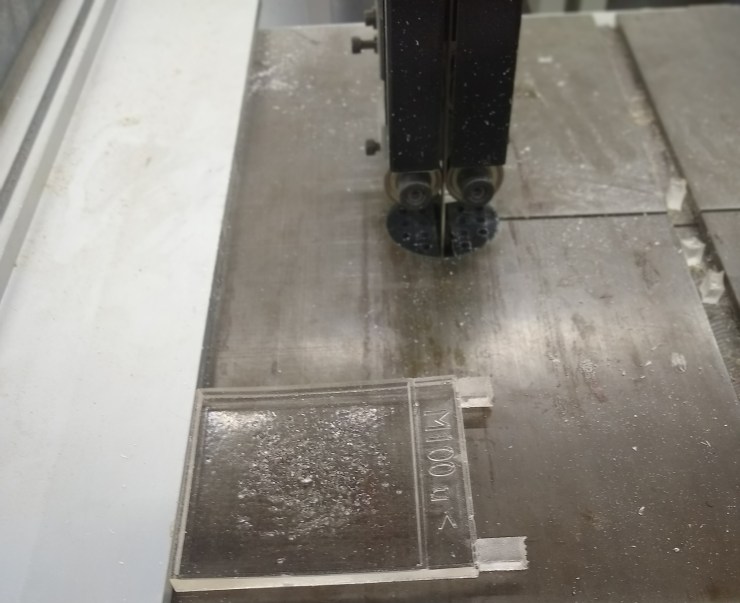
Making the masters
This process starts with making high quality “master” models for each of our galaxies. This was done using a CNC milling machine and high density foam.
Making the moulds
Next 3D printed name plates were attached to each of the masters and a silicone mould was made for each galaxy.

Before poring the resin each of the moulds needed to be clamped closed.

Poring the resin
Clear resin was pored into each of the moulds using a paper funnel.

After the resin has set (about 10 hours) the models can be taken out of the moulds and the pour spouts are cut off with a band saw.
Sanding the edges
The edges were sanded down using a belt sander. This removed any imperfections along the sides.

Filling in any air bubbles
Wood filler was used to fill in any air bubbles along the edges. After it dried the filler was hand sanded to a smooth finish.

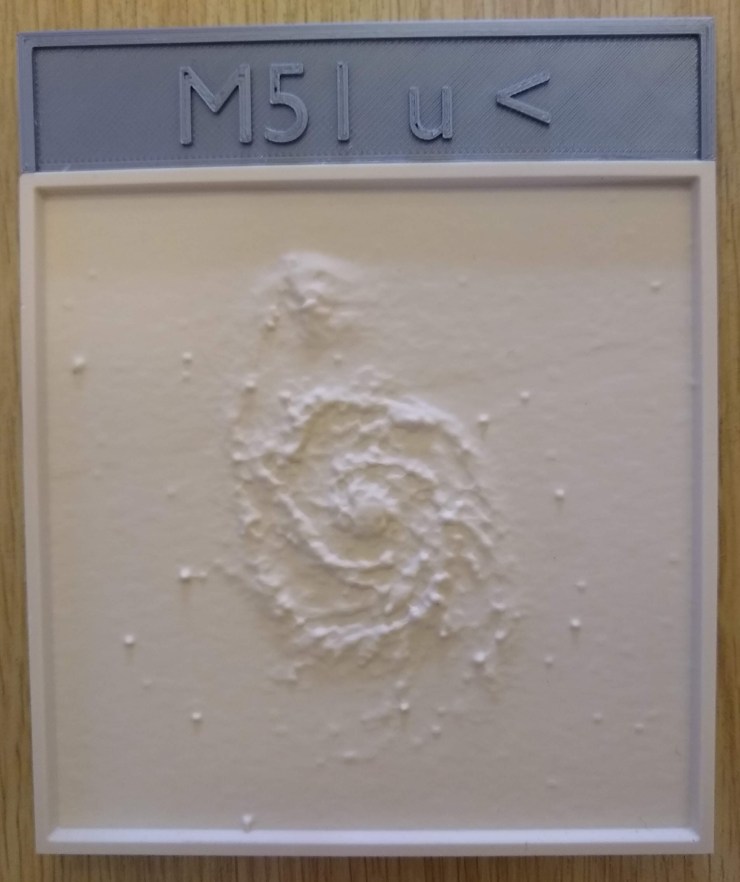
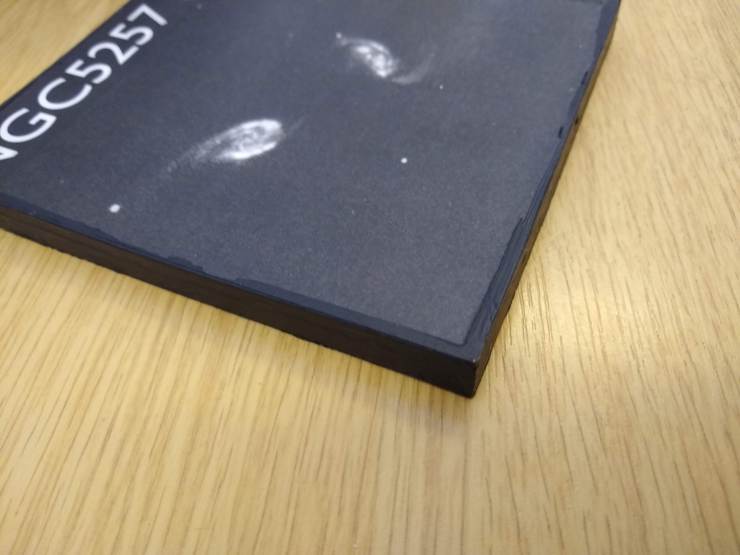
Attaching the images to the back and painting the edges
After the filler was sanded the black and white galaxy images were attached to the back. This was done with two-sided adhesive sheets that were placed between the image and the model. Finally black acrylic paint applied to all the edges. This paint acts to both cover up the filler and to seal the edges of the attached image in so they do not peal off.
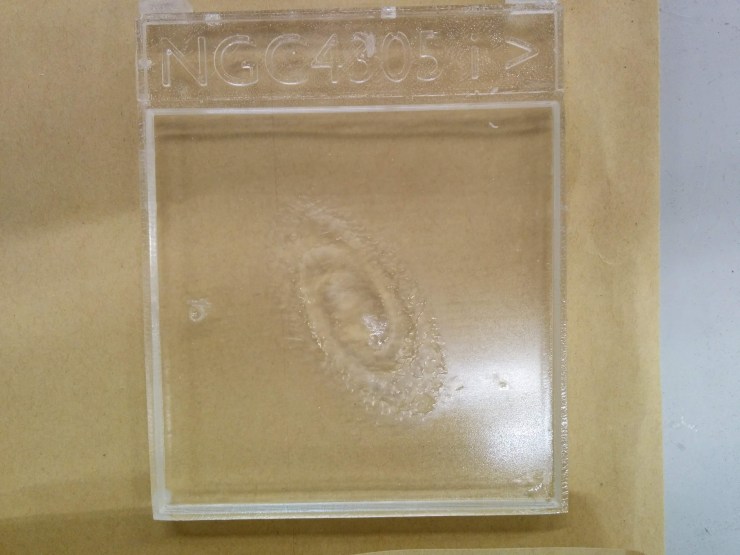
Improving the image embedding process
After casting the first few kits we started embedding the galaxy images directly inside the resin models. This was done by placing the galaxy images inside the moulds before pouring the resin. To ensure the image stays in the correct place a 3D printed plastic frame holds the image directly in the middle of the model.
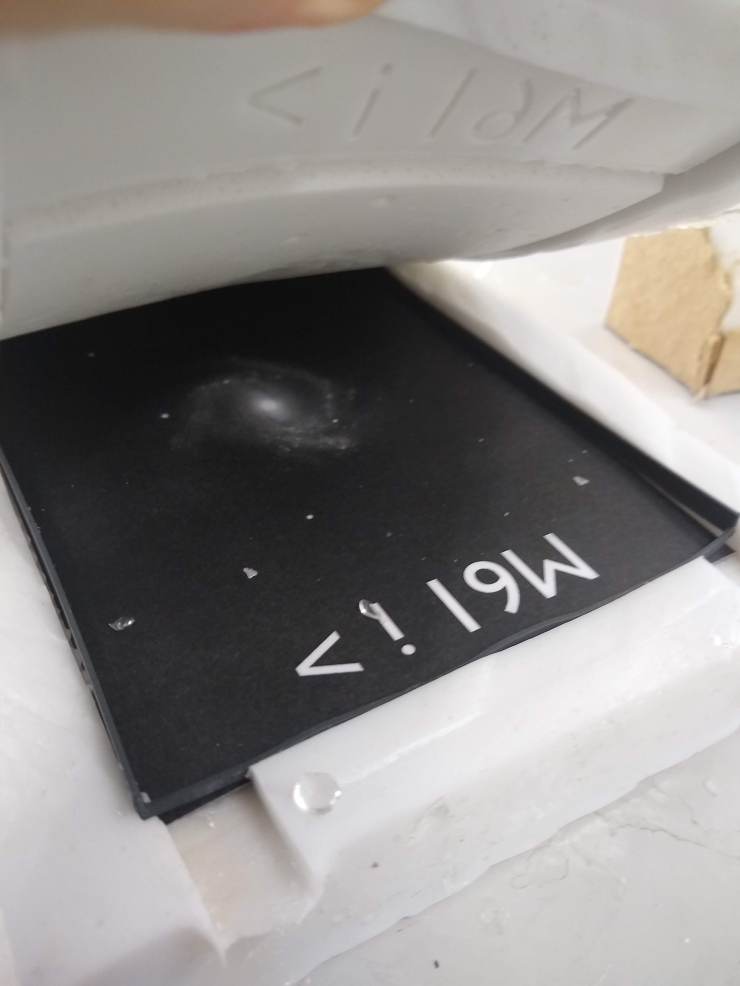
As with the clear models the edges are filled, sanded, and panted.

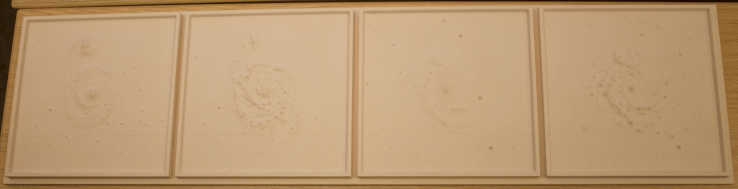
The final model
When finished our galaxy models are ready to be packed into a kit.


