
The next step of the model making process is creating printable name plates for each model. We have created another custom blender plugin to help with the process, name_plate.py available from our GitHub page.
EDIT (Feb 24, 2020): For Blender 2.80 or higher make sure to use v4.0 or higher of the plugin. New features have also been added since these posts were made, updated version will be available soon.
Step 1: install the plugin
See our previous blog post about setting up Blender for instructions on installing a plugin from a file.
Step 2: Add a name plate object
Press shift + a, mouse over Mesh, and click on Name Plate. This will add a basic name plate object to the scene.

Step 3: Adjust view to wireframe mode
It is a bit hard to see the words on the added name plate object by default since the text is the same color as the base. To help see what is going on you can change the Viewport to Wireframe mode.
Click on the Display button at the bottom of the Viewport and select Wireframe.

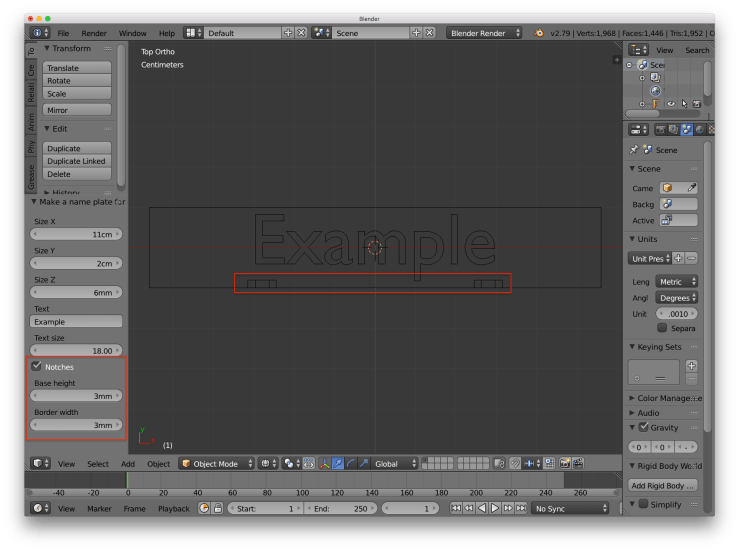
Step 4: Adjust the parameters
After inserting the name plate there are several parameters that can be adjusted.
Size X: the size in the x-direction. This should match up with the x-size of the base model.Size Y: the size in the y-direction. If you adjust the text size you might want to adjust this as well.Size Z: the size in the z-direction. This should match the total thickness of the base model.Text: the text you want on the name plate.Text size: the size of the text. If you adjust this you might want to adjust the y-size as well.

Step 4.1: Add notches to the name plate
The last three parameters a used create notches on the bottom of the name plate and adjust their size. These should be used if the base model was printed with the “top edge off”. These notches will line up with the ones on the base model.
Notches: check this box if you want notches on the bottom of the name plate.Base height: This should match theBase heightparameter used for the base model.Border width: This should match theBase widthparameter used for the base model.
Step 5: Export STL file
The final step is to export the STL file. Go to File > Export > Stl, on the export page set -Z Forward and -X up so the resulting file is oriented correctly when you go to print the file.

In the next blog post we will go over how to make name plates with the command line.

1 thought on “4. How to make name plates”