
All of our models are created using Blender, an open source 3D modeling tool, using a custom Emboss Plane plugin. For those familiar with the Blender interface here are step-by-step instructions for making your own models.
EDIT (Feb 24, 2020): For Blender 2.80 or higher make sure to use v4.0 or higher of the plugin.
EDIT (Jan 8, 2025): For Blender 4.0 or higher make sure to use v5.0 or higher of the plugin. The Blender interface has changed slightly since these posts were made, an updated tutorial will be available soon.
Step 1: Using real world units
If you have set up your Startup File as outlined in the previous blog post this step has already been done. But as it is important we will cover it again.
In the scene tab set the Units to Metric with a scale of 0.001. This makes it so one blender unit is equal to 1 mm.

Step 2: Import the image
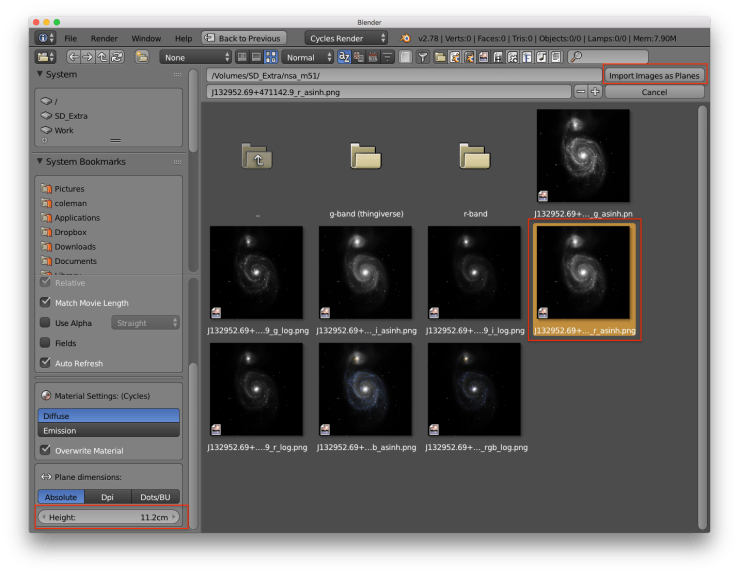
Use the Import Images as Planes plugin to add a plane with your grey scale galaxy image as a texture. The keyboard shortcut for this is SHIFT + A > Mesh > Images as Planes.

Step 3: Set the image size
When selecting an image set the Height to the value to the size you want, we use 112 mm for our models. Press the Import Images as Planes button in the upper right of the window after selecting an image. Blender accepts all major image formats.
Step 4: Use Emboss Plane
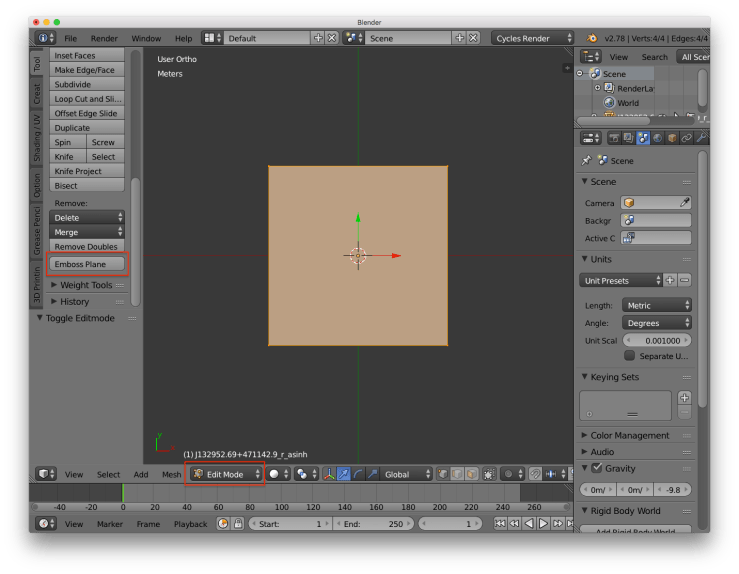
Enter Edit Mode and click the Emboss Plane button located at the bottom of the Tools tab.
Step 5: Change settings
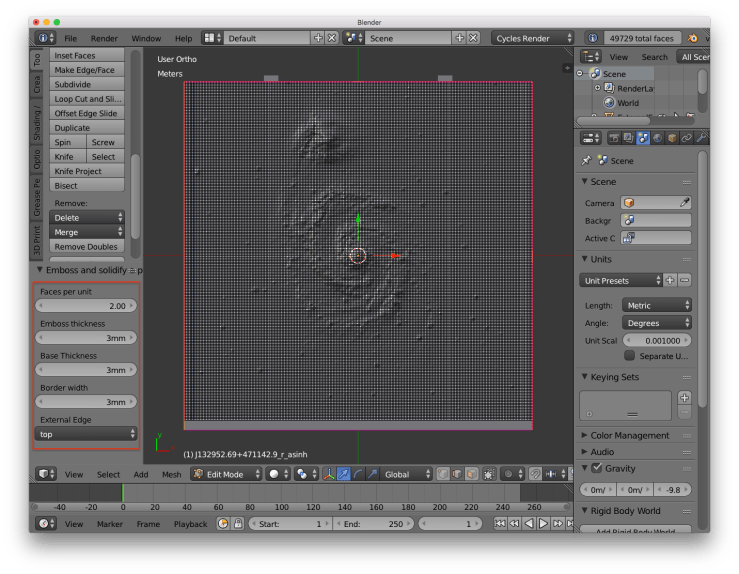
Use the settings on the side to control the size and shape of various features.
Faces per unit: the number of polygon faces per unit (1 unit = 1 mm, see step 1)Emboss thickness: how high “white” is extruded above the planeBase thickness: how far below “black” the model will extend to turn the plane into a rectangleBorder width: how wide the border around the outside isExternal Edge: if you want to avoid using supports when printing you can remove one of the edges
Step 6 (Optional): Smooth out noise
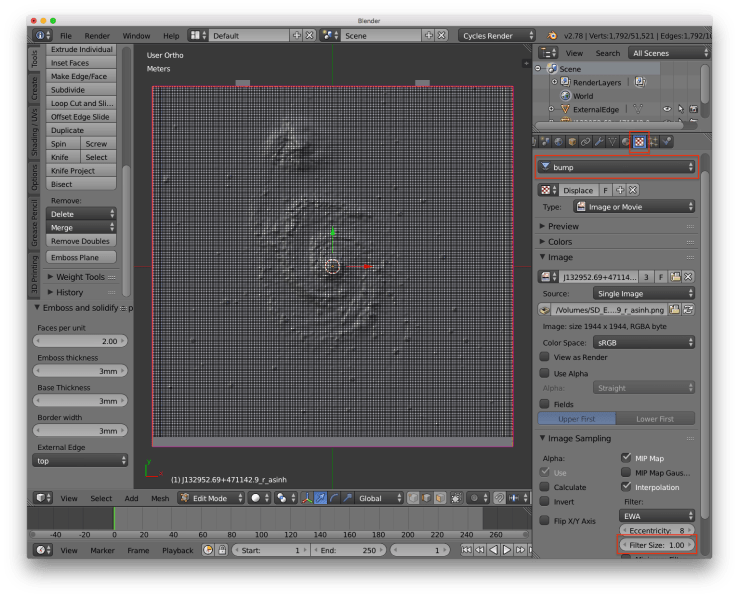
If the resulting model is very spiky (e.g. lots of foreground stars) you can add smoothing to the original image. In the Textures tab select the bump texture and in the Image Sampling section increase the Filter Size.
Step 7: Export as STL
Go back to Object Mode and export your file File > Export> Stl.

Step 8: Set export parameters
On the export page set Z Forward, X up (assuming you set the Top edge as the external one), and make sure only Apply Modifiers is checked. Set the name of the file and click the Export STL button.

Step 9: Slice and print
Import the resulting .stl file into your favorite slicer program and print the model. The model should be printed “edge on” (as displayed below) for best results.

In out next blog post we will go over using Blender from a command line script.

3 thoughts on “2. How to make your own models”